
Create an API key and choose its permissions
Create a CodeQR API key in Settings → API Keys, pick All Access, Read-Only or Restricted permissions, copy it once, check Last used, rotate or delete it.

An API key is the secret a program, script or automation tool sends to act on your workspace. This guide creates one with the least permissions the job needs, shows where the key is displayed (once), and how to check, rotate or revoke it later.
Availability
- Plan: every plan, including Free. The plan sets the requests-per-minute limit of the key: Free 60, Starter 100, Pro 500, Business 1,000, Scale 10,000.
- Where: Settings → Developer Settings → API Keys (page title Project API Keys). Any workspace member can create, edit and delete keys.
Before you start
- A key belongs to the workspace where you create it. It cannot reach another workspace, and you cannot move it.
- Decide who should own it. You ties the key to your user; if you are removed from the workspace, the key stops working. Machine creates a bot member and ties the key to it, so the key survives people leaving.
- Decide what it needs. Reading analytics does not need write access; a Zapier scenario that only creates links does not need domains or webhooks.
- You will see the full key exactly once. Have your password manager or secret store open.
Steps
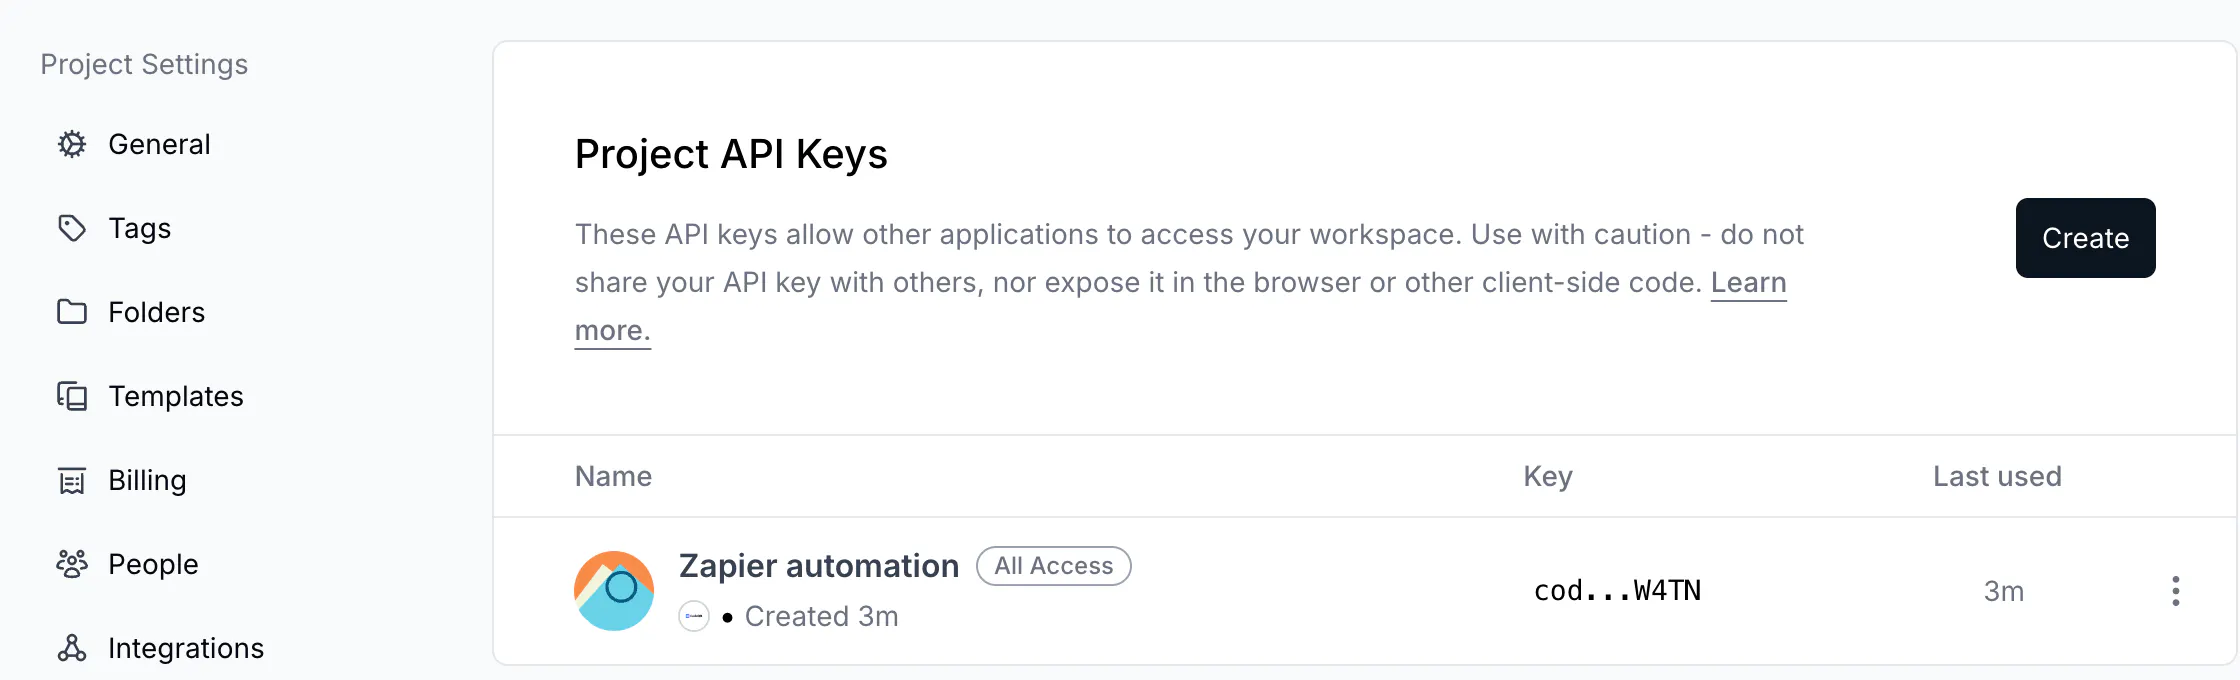
- Open Settings → API Keys and click Create.
- In Add New API Key, choose You or Machine. The tooltips say it plainly: This API key will be linked to your user account – if you are removed from the project, it will be deleted versus A new bot member will be added to your project, and the key will be associated with it. Since the key is not linked to your account, it will not be deleted if you leave the project.
- Type a Name that says where the key will live — the tool or server, not the person (
Zapier automation,Sheets sync,Backend prod). - Under Permissions, pick one: - All Access — This API key will have full access to all resources. - Read-Only — This API key will have read-only access to all resources. This is the default. - Restricted — This API key will have restricted access to some resources, then choose None, Read or Write per resource: Links, QR Codes, Pages, Tags, Folders, Domains, Projects, Analytics (Read only), Conversions (Write only), Webhooks. Write always includes Read.
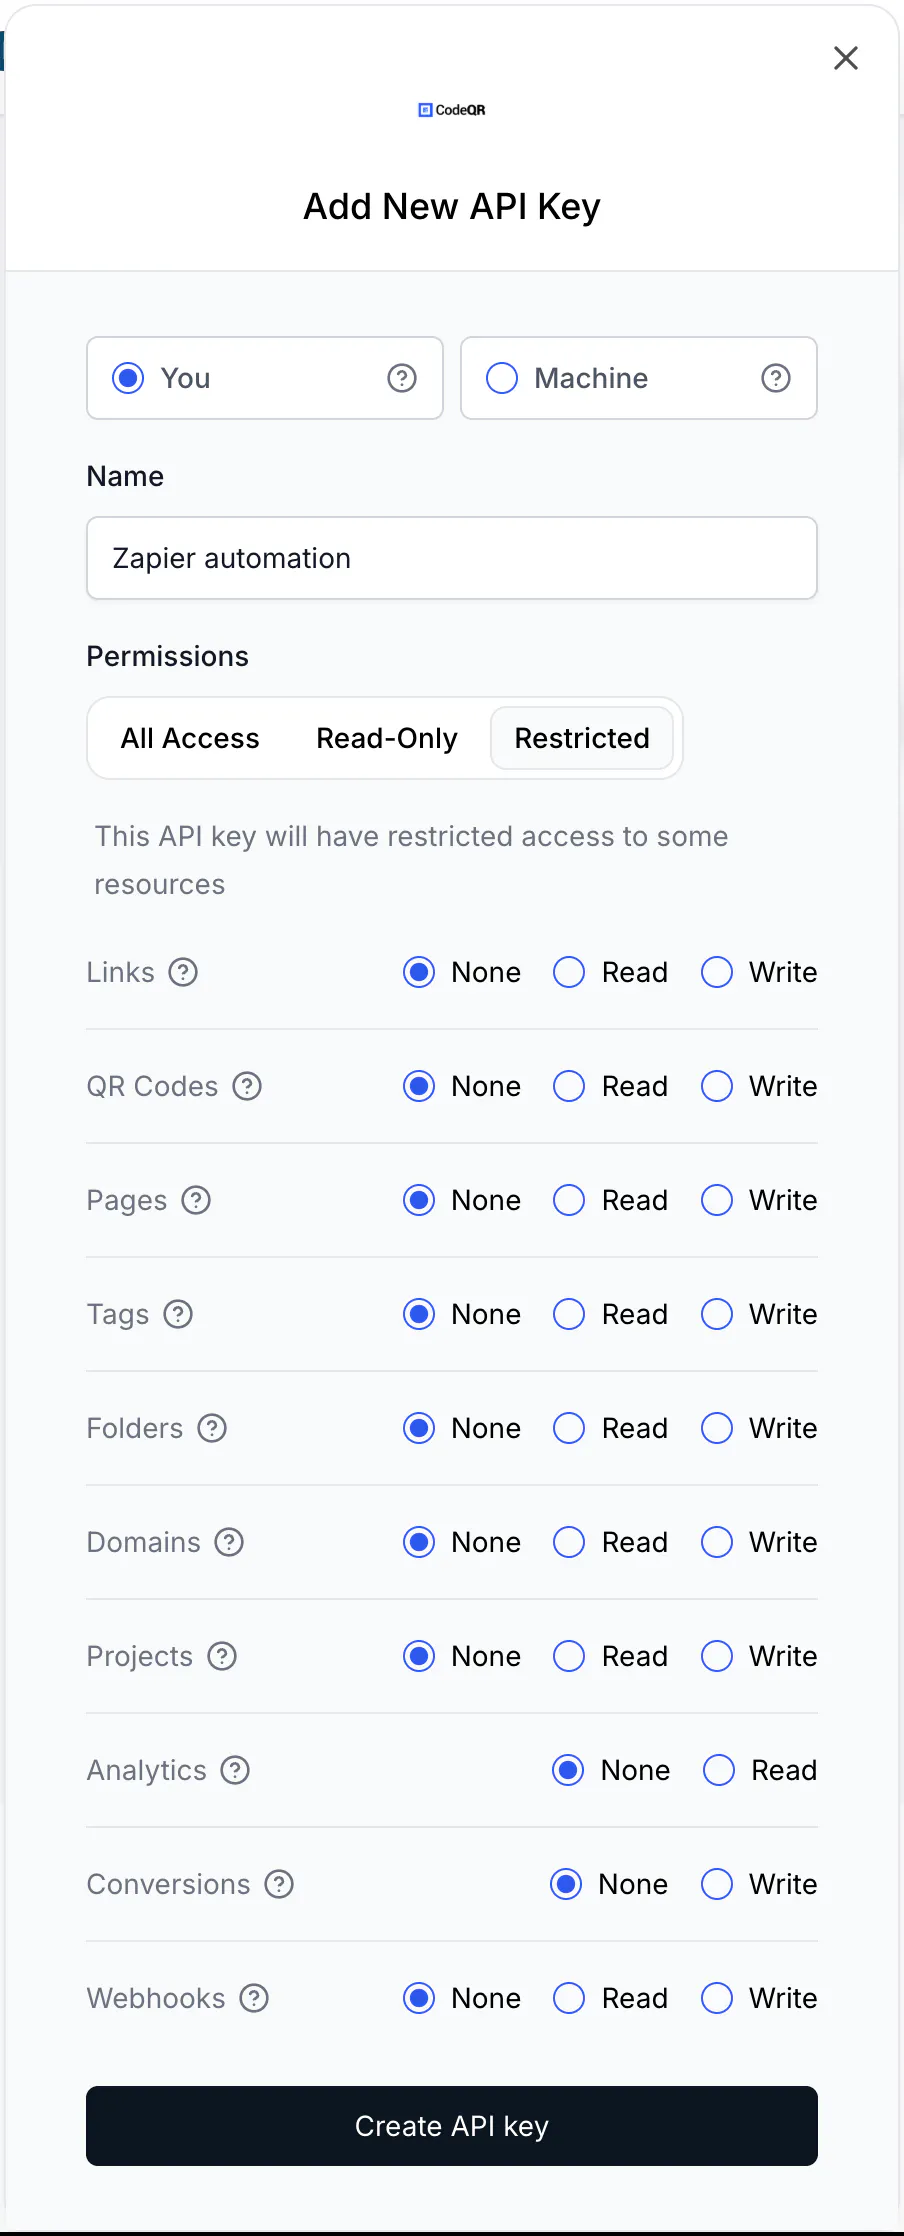
- Click Create API key.
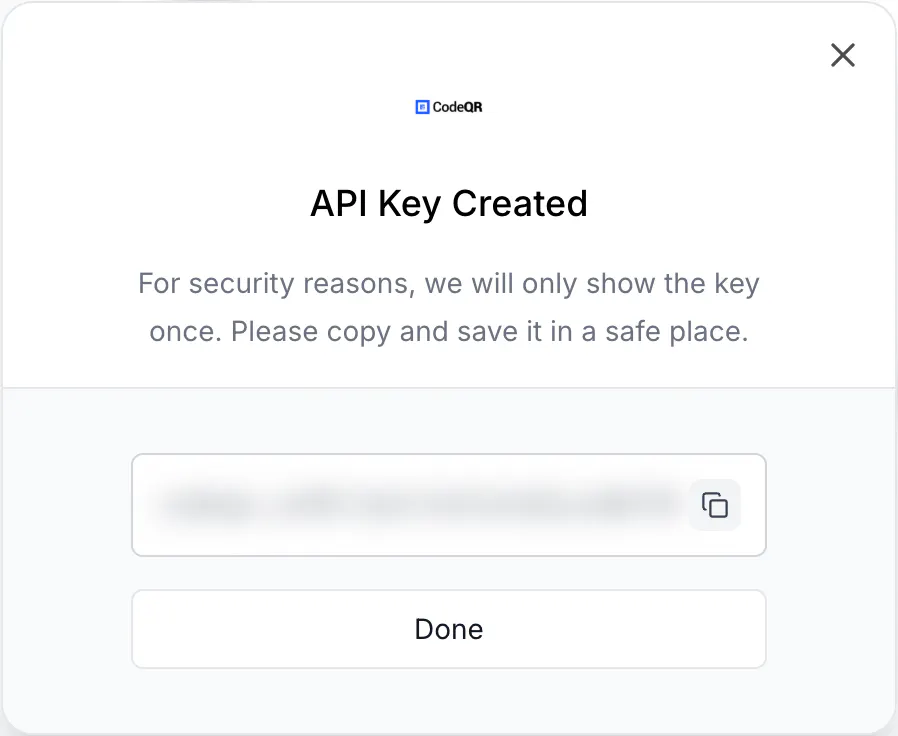
- In API Key Created, copy the key with the copy icon and store it. The dialog says For security reasons, we will only show the key once. Please copy and save it in a safe place. Then click Done.
The key starts with codeqr_ and is 31 characters long. In the list it appears masked (cod...W4TN) with its permission badge, creation date and Last used.
Manage the key later
- Last used switches from Never to a relative time after the first successful request — a quick way to see whether an integration is alive.
- Click ⋮ on the row for Edit API Key (name and permissions only — the secret never changes) or Delete API Key. Deleting asks you to confirm — This will permanently delete the API key and revoke all access to your account. Are you sure you want to continue? — with Confirm deletion; every request with that key answers
401from then on.
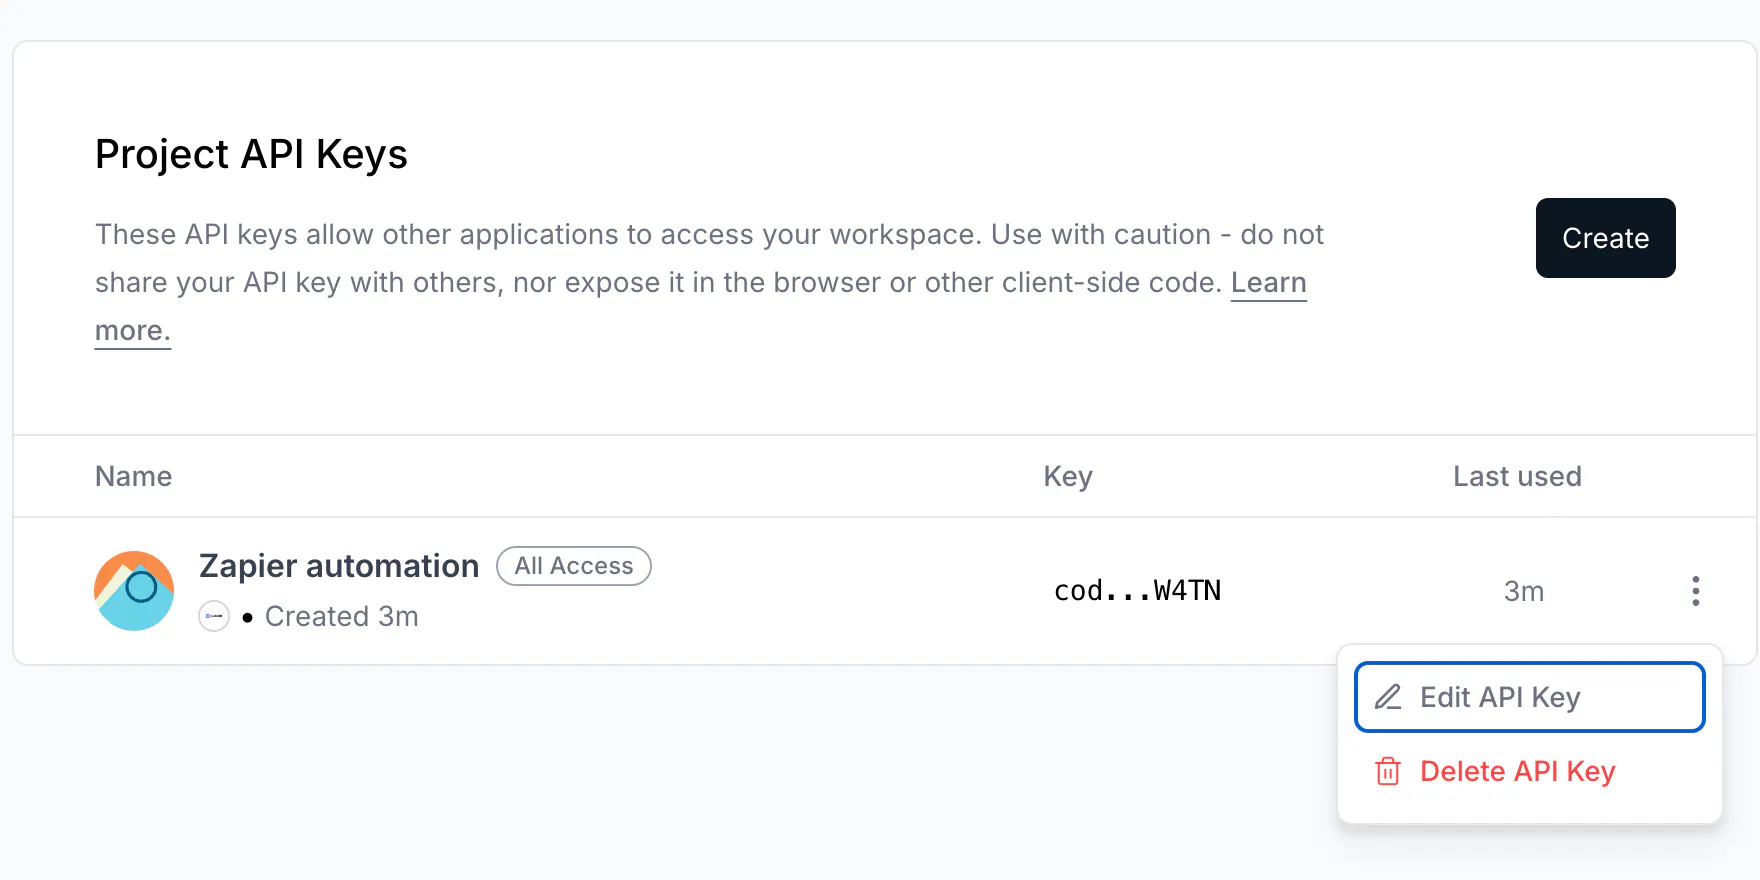
- To rotate a key: create a new one with the same permissions, switch the tool to it, confirm Last used moves on the new key, then delete the old one. There is no regenerate button.
- Keys created by integrations: when you enable Zapier, Make, IFTTT or another OAuth integration, it appears in this list under the integration's name. Deleting that key breaks the integration; disable the integration from Settings → Integrations instead.
- What a key can never do: manage API keys, OAuth apps or integrations. Those stay in the dashboard.
Do the same via API
Not possible by design — keys are created, edited and deleted only in the dashboard. Everything else in this series works with the key you created above:
curl https://api.codeqr.io/links?pageSize=1 \
  -H "Authorization: Bearer codeqr_••••••••••••••••••••••••"
Verify it works
- Run the request above. A
200with a JSON array (possibly empty) means the key is valid and has read access to links. - Refresh API Keys: Last used now shows a time.
- Try a write with a read-only key to see the guard rail:
POST /linksanswers403with The provided key does not have the required permissions for this endpoint in the project '…'. Having the permission 'links.write' would allow this request to continue.
Troubleshooting
I closed the dialog and cannot see the key again
The plaintext is shown only once. Delete the key and create a new one; the list only ever shows the masked form.
The key works in my terminal but the tool says "Unauthorized: Invalid API key."
The key was pasted with a space or line break, or a key from another workspace was used. Keys are workspace-bound; the URL of the request has no workspace in it, so a wrong key silently points at the wrong workspace or is rejected. Create the key inside the workspace the tool should write to.
The tool asks for a "workspace ID", "project slug" or "team"
The key already identifies the workspace; projectSlug and projectId in the query string are ignored for API keys. Leave such fields empty, or use the workspace slug shown in the URL of the dashboard if the field is mandatory in the tool.
Some Write options are missing when a member creates a key
Domains → Write, Projects → Write, Conversions → Write and Webhooks → Write are owner-only permissions. A key can never do more than the person who created it, so a member's key is granted at most what a member can do.
The key I gave a contractor keeps working after they left
Only keys created as You by that person are deleted when the person is removed. Machine keys stay. Review API Keys and delete what should go.